
Cloud Code 必須使用 Google Cloud CLI,才能將應用程式部署至 App Engine。本頁面說明如何將外掛程式設定為自動管理 gcloud CLI,或讓您自行管理 gcloud CLI。
如要查看目前的 gcloud CLI 設定:
依序選取「File」>「Settings」(如果是 Mac OS X,則依序選取「IntelliJ IDEA」>「Preferences」)。
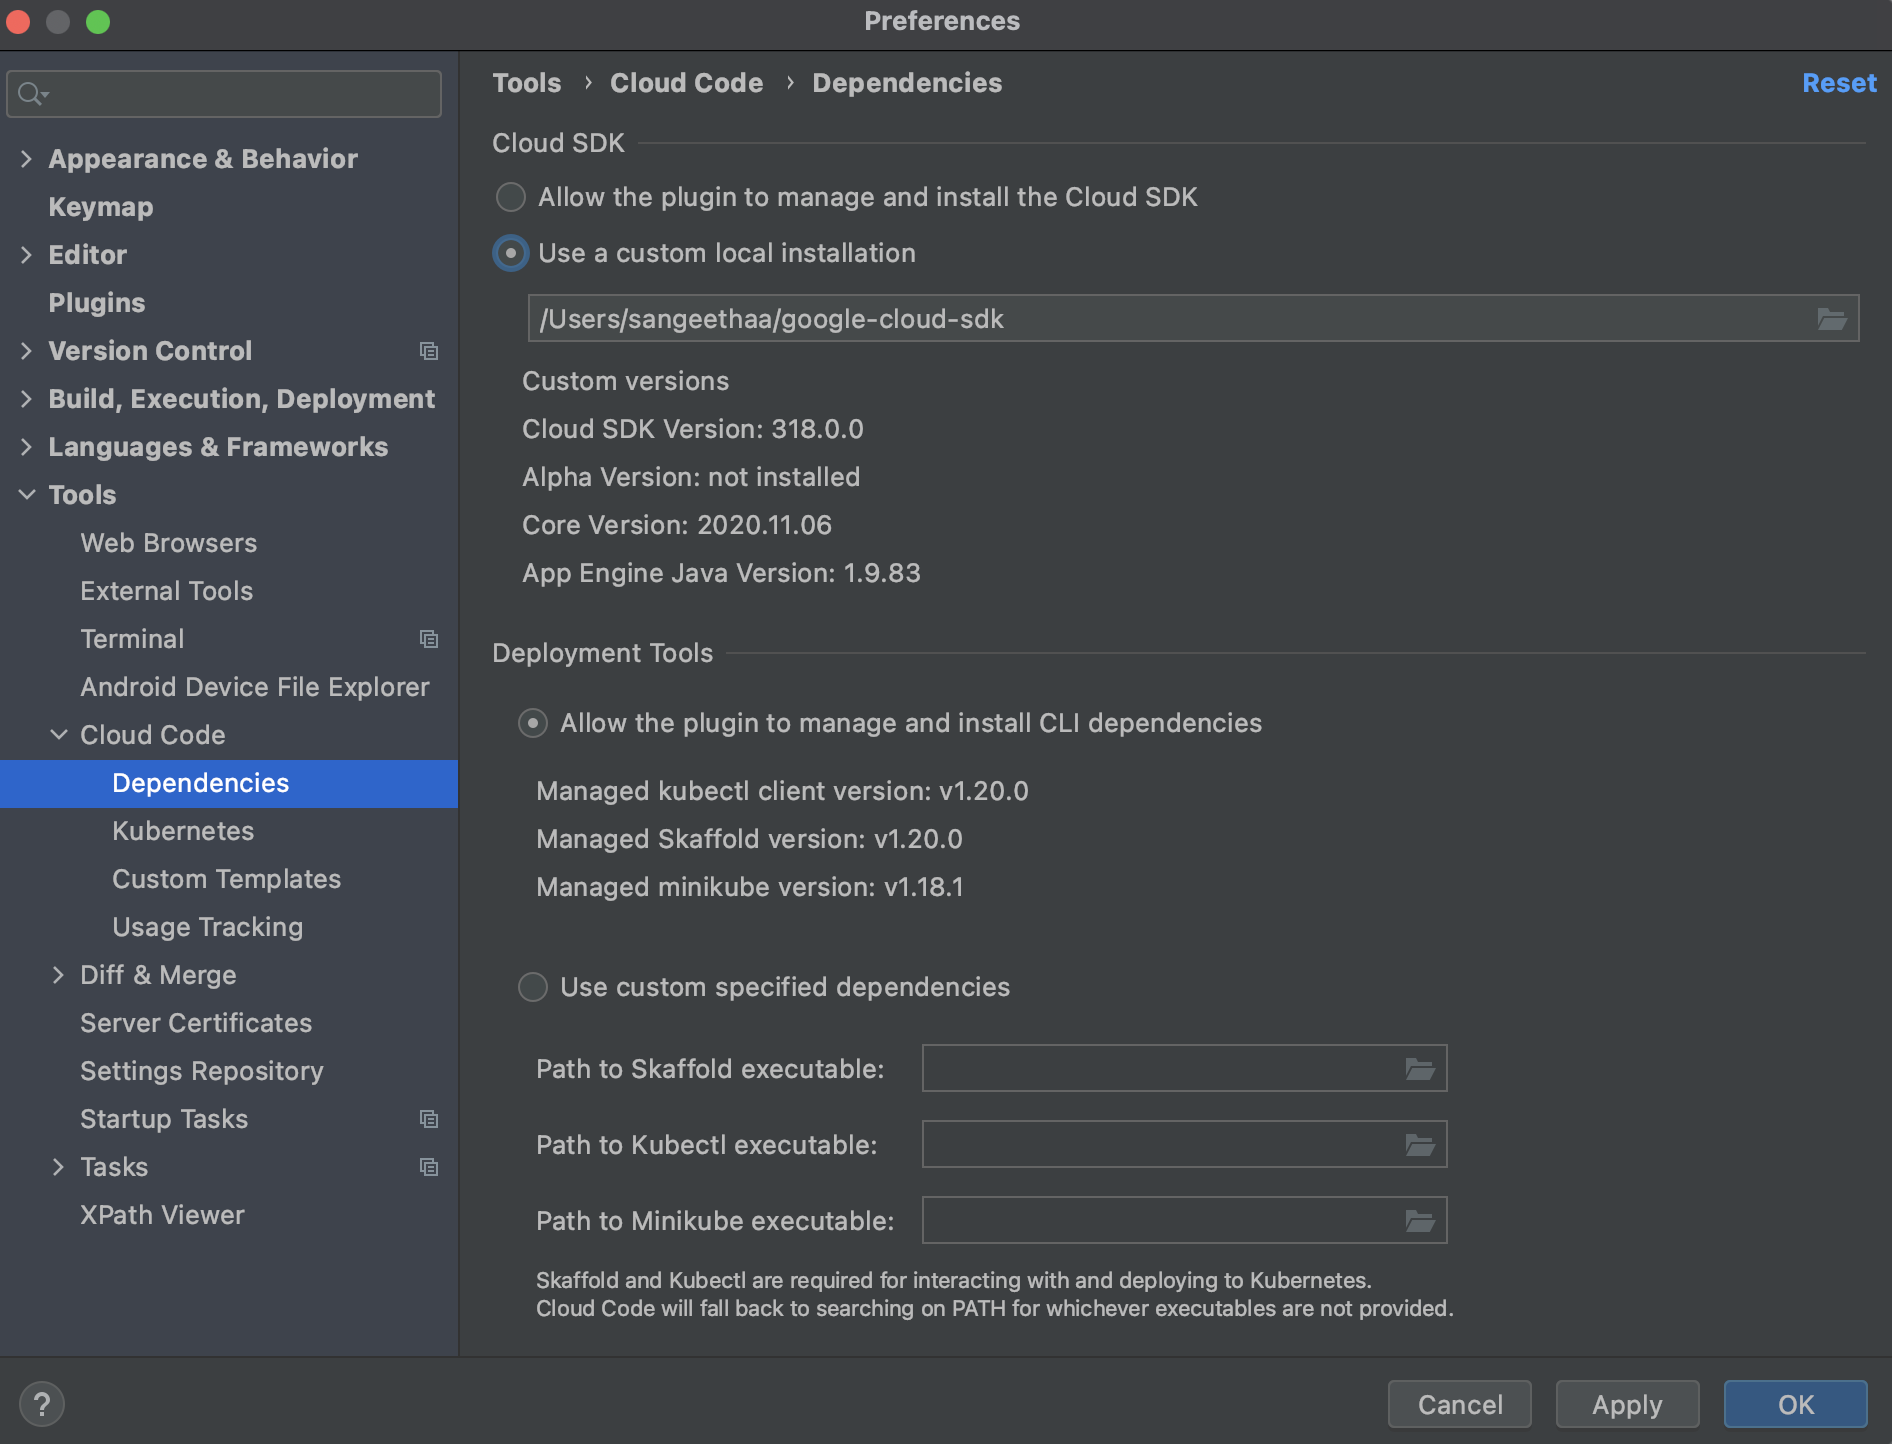
在「Preferences」對話方塊中,依序選取「Tools」 >「Cloud Code」 >「Dependencies」,然後設定「Cloud SDK」部分。
自動管理的 gcloud CLI
如果您尚未設定 gcloud CLI,外掛程式會自動下載最新版的 gcloud CLI。這項服務也會定期檢查及安裝更新。
外掛程式會在下列活動進行期間檢查 gcloud CLI:
在您安裝外掛程式時
在您啟動 IntelliJ 時
在您部署 App Engine 應用程式時
在您啟動 App Engine 標準本機伺服器時
當您選取「Allow the plugin to manage and install the gcloud CLI」(允許外掛程式管理及安裝 gcloud CLI) 選項後,Cloud Code 就會開始管理 gcloud CLI。

您也可以勾選「Automatically update the SDK」核取方塊,讓外掛程式更新 gcloud CLI。如果 gcloud CLI 已過期,「Update now」按鈕就會啟用,讓您立即更新 gcloud CLI。
自行管理的 gcloud CLI
如果您先前已透過 gcloud CLI 設定 Cloud Code,系統就會繼續使用該安裝項目。
如要繼續自行管理 gcloud CLI:
在「Cloud SDK」頁面,選取 [Use a custom local installation] 選項。
按一下該欄位旁的「瀏覽」資料夾圖示,然後瀏覽至您要使用的 gcloud CLI。
按一下 [確定]。
IntelliJ 會使用指定的安裝項目。如要更新 gcloud CLI,請先下載要使用的 gcloud CLI,然後在這個對話方塊中選取前往該 CLI 的路徑。